Your own Virtual Machine.
Todays post will guide you trough the one of the most basic stuff. How does your system works?
Note: I’m also learning. If you find any wrong or misleading information, please write to me.
Note: All the code you may find at my github in Blog repository
I always wanted to understand how this all works. How it is happening that I can tell to my system what it have to do and how it do it. So I thought that the best learning method is to do something and that is how this Virtual Machine was created. Of course it is not finished (I hope someday it will be) but it’s purpose is to show you how you compilers and interpreters work. It has only few operations with PoC program.
Let’s begin.
What do we need to build our own Virtual Machine?
- Set of registers - in my case I have got 10 registers.
From 0 to 8 - general purpose registers.
Register number 9 is Instruction Pointer (MIP) and register number 10 is Stack Pointer (MSP). In addition we have EFLAG register, where last 3 bits are accordingly OF, CF and ZF. - Memory module - 1 MB of RAM.
- Instruction implementation - in my machine I have implemented only 6 instruction, which is more than enough to visualise how it works.
- Main loop.
But before that we have to specify instructions set for our machine. To do that I just wrote macros for NASM[1] (ofcourse you can do it on normal instructions and opcodes). Little expample (instructions are not accidental):
%macro lbADD 2
db 0x00, %1, %2
%endmacro

%macro lbCMP 2
db 0x01, %1, %2
%endmacro

%macro lbJZ 1
db 0x06
dw (%1 - ($ + 2))
%endmacro

%macro lbSET 2
db 0x03, %1
dw %2
%endmacro
Ok, What the hell just happened?
About macros you can read in [1], but here’s some information. lbADD or lbCMP are instruction names. The following number its just number of arguments to which we refer by %<<number of argument>>. db or dw means put byte or put word. More you can read in [2].
But I’m sure you are wondering at this line dw (%1 - ($ + 2)) the most.
As you can see it is part of macro for lbJZ, so for instruction Jump Zero (lb is just from lowerbyte). To learn more about JZ instruction we have to go to the Intel Architectures Software Developer’s Manual volume 2, chapter 3, point 3.2.
If you do not have it near the hand let me paste one fragment
The target instruction is specified with a relative offset (a signed offset relative to the current value of the instruction pointer in the EIP register). A relative offset (rel8, rel16, or rel32) is generally specified as a label in assembly code, but at the machine code level, it is encoded as a signed, 8-bit or 32-bit immediate value, which is added to the instruction pointer. Instruction coding is most efficient for offsets of –128 to +127. If the operand-size attribute is 16, the upper two bytes of the EIP register are cleared, resulting in a maximum instruction pointer size of 16 bits.
So when you wrote in assemlby JZ some_label in reality it is translate as <<target address>> - (<<instruction adress>> + 2).
From where he got this 2?
As you can see in the pasted fragment of instruction description we have: a signed offset relative to the current value of the instruction pointer in the EIP register, but the EIP register contains the address of the instruction following the JZ instruction, that is why we need to add another two bytes ($ means the current position).
When we have our instruction set coded we need to test it, so lets write some simple code:
%include "instructions.asm"

lbSET r4, data
lbSET r1, 1

lbLB r2, r4
lbOUT r2
lbADD r4, r1

data:
  db "Hello World", 0xa, 0
After compiling it with nasm <<filename>> -f bin -o <<output name>> we can see if bytes are in correct order.

As you can see the first instruction in our test file is lbSET which has opcode db 0x03 and is followed by r4 and data. Now lets have a look at the hexdump.The first byte is 03 which is the opcode, next byte is 04 which is the register 4 and the next bytes are 10 00, which is the place at the memory where our Hello World is placed! Yes! It worked!
I encourage you to check the others bytes and compare them to instruction set, which you can find at my github.
Great! So if we have our compliler works not it is time to write the interpreter! I will use Python 3, but C is also very good for this task.
As I wrote at the very beginning. We need instruction set, memory module and main loop.
So one by one.
I have implemented only 6 instructions: lbADD, lbCMP, lbMOV, lbSET, lbLB, lbSB, lbOUT for addition, comparision, movement, setting value, loading byte, setting byte and to print on the screen.
def lbADD(lbvm, *args):
    lbvm.registers[args[0]].r = lbvm.registers[args[0]].r + lbvm.registers[struct.unpack("B",args[1])[0]].r

def lbCMP(lbvm, *args):
    compare = lbvm.registers[args[0]].r - lbvm.registers[args[1]].r
    if compare == 0:
        lbvm.ZF = 1
    if compare < 0:
        lbvm.CF = 1

def lbMOV(lbvm, *args):
    lbvm.registers[args[0]].r = lbvm.registers[args[1]].r

def lbSET(lbvm, *args):
    lbvm.registers[args[0]].r = struct.unpack("<H", args[1])[0]

def lbLB(lbvm, *args):
    byte = lbvm.registers[struct.unpack("B",args[1])[0]].r
    lbvm.registers[args[0]].r = byte

def lbSB(lbvm, *args):
    byte = lbvm.registers[args[1]].r
    lbvm.memory.storeByte(lbvm.registers[args[1]].r)

def lbOUT(lbvm, *args):
    #This won't be implemented, instead I will use simple print function.
    print(chr(lbvm.memory.mem[lbvm.registers[args[0]].r]))
To every of these functions I’m passing the instance of lbvm which is instance of main VM class (more in a minute) and packed args.
Constructor of main VM class LBVM initialize main parts of the machine:
class LBVM:
    def __init__(self):
        self.registers = [LBRegisters() for i in range(10)]
        self.MIP = self.registers[8]
        self.MSP = self.registers[9]
        self.EFLAG = bytearray(8)
        #EFLAG [0   0   0   0   0   0   0   0]
        #                           ^   ^    ^
        #                           |   |    |
        #                           OF  CF   ZF
        self.ZF = self.EFLAG[7]
        self.CF = self.EFLAG[6]
        self.memory = LBMemory()
        self.MIP.r = 0
        self.MSP.r = 500000
	self.offset = 0
LBMemory is class responsilbe for memory management which is loading to the memory and reading from the memory.
class LBMemory:
    def __init__(self):
        self.mem = bytearray(1048576)

    def storeByte(self, byte, offset):
        self.mem[offset] = byte

    def loadByte(self, offset):
        return self.mem[offset]
And LBRegisters is very simple class, which simply assign 0 to attribute r of own instatnce.
class LBRegisters:
    def __init__(self):
        self.r = 0
So for now we have memory module, implemented instructions, bytecode to test our machine! Lets go with the main loop!
    def readBytecode(self, filename):
        with open(filename, 'rb') as f:
            for i in f.read():
                self.memory.storeByte(i, self.offset)
                self.offset += 1

    def execute(self, opcode):
        arg1 = self.memory.mem[self.MIP.r+1]
        arg2 = self.memory.mem[self.MIP.r+2 : self.MIP.r+1 + dir_of_opcodes[self.memory.mem[self.MIP.r]][1]]
        func = dir_of_opcodes[self.memory.mem[self.MIP.r]][0]
        func(self, arg1, arg2)
        self.MIP.r +=dir_of_opcodes[self.memory.mem[self.MIP.r]][1]+1


    def run(self):
        i = 0
        while i != self.offset:
            self.execute(self.memory.mem)
            i += 1
        sys.exit()
These three methods of class lbVM are the main ones.
readBytecode is reading the bytecode we generetaded with our modified assembler, execute is taking the byte and arguments (arguments are just next bytes) and because we definied global dictionary it knows how many arguments it should take and run just executing next bytes untill end of the file.
Now we have all of the parts of our own machine. Lets write simple program to test it. Basically it’s just copy on paste of our earlier program. As I did not implemented jumps it is quite long. Its just take one byte and print it, then adds one byte so we would jump on the other char and repeat untill the end of the file:
%include "instructions.asm"

lbSET r4, data
lbSET r1, 1

lbLB r2, r4
lbOUT r2
lbADD r4, r1
lbLB r2, r4
lbOUT r2
lbADD r4, r1
lbLB r2, r4
lbOUT r2
lbADD r4, r1
lbLB r2, r4
lbOUT r2
lbADD r4, r1
lbLB r2, r4
lbOUT r2
lbADD r4, r1
lbLB r2, r4
lbOUT r2
lbADD r4, r1
lbLB r2, r4
lbOUT r2
lbADD r4, r1
lbLB r2, r4
lbOUT r2
lbADD r4, r1
lbLB r2, r4
lbOUT r2
lbADD r4, r1
lbLB r2, r4
lbOUT r2
lbADD r4, r1
lbLB r2, r4
lbOUT r2
lbADD r4, r1
lbLB r2, r4
lbOUT r2
lbADD r4, r1
lbLB r2, r4
lbOUT r2
lbADD r4, r1

data:
  db "Hello World", 0xa, 0
Now you have to compile it as it was done earlier and after that we can finally check everything.
Lets run our Virtual Machine with python virtualmachine.py <<file name>> to see if it actually works:
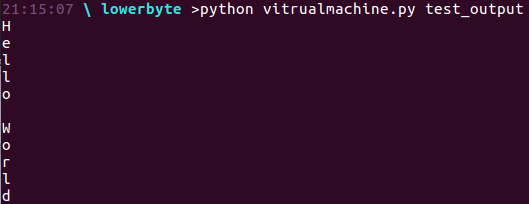
Yes it is! Now I can write some real programs for it!
Ofcourse it doesn’t have any interruption system implemented nor IO modules, but its just example. If you want to add more stuff to it - feel free : )
And that’s it, see you next time!
[1]. http://www.nasm.us/xdoc/2.11.08/html/nasmdoc4.html#section-4.3
[2]. http://www.nasm.us/xdoc/2.11.08/html/nasmdoc3.html#section-3.2